
Looking for a fun and safe way to introduce your little ones to the world of painting? Taste Safe Finger Paints are the perfect solution! This activity is designed for babies who love to put everything in their mouths, making it a worry-free way to let them explore their creativity. Made from edible ingredients, these finger paints are completely safe for your baby to touch, taste, and play with, giving you peace of mind while they have fun.
This activity is also great for families with multiple kids. Whether you have a curious baby or an busy toddler, Taste Safe Finger Paints offer a wonderful opportunity for siblings to enjoy an art project together. It’s a fantastic introduction to painting for babies, helping them develop their sensory and motor skills, while older kids can experiment with colors and techniques. This shared, sensory-rich experience not only fosters creativity but also strengthens the bond between siblings as they create and explore together!
Make sure to check out my list of our favorite paint materials for toddlers!
Disclosure: Some of the links below are affiliate links, meaning, at no additional cost to you, I will earn a commission if you click through and make a purchase.

Taste Safe Finger Paint Ingredients
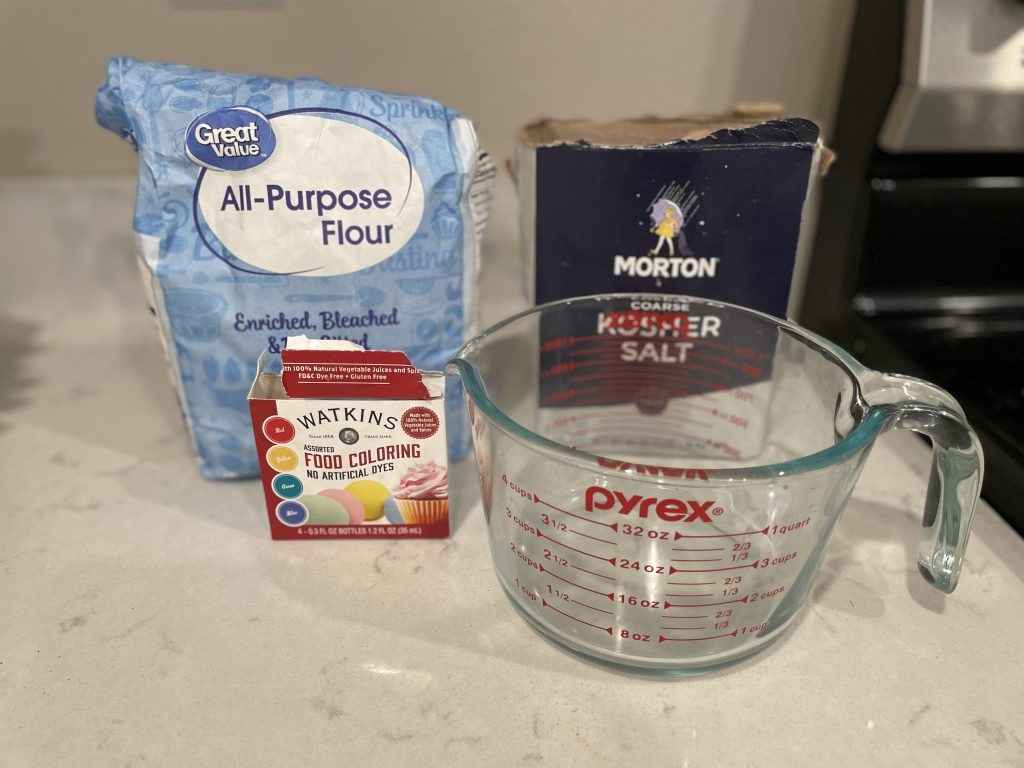
To make Taste Safe Finger Paints, you’ll need just a few simple ingredients that you probably already have in your kitchen. Here’s what you’ll need:
- Water
- Flour
- Salt
- Food Coloring
I like to use this food coloring that has no artificial dyes, making it safer for my baby to use. The colors aren’t as vibrant as traditional food coloring, but I feel better knowing it is healthier for her.
How to Cook Flour so it is Safe to Eat

While this step is probably unnecessary since we will be cooking the flour on the stovetop, I like to pre-cook the flour just to be extra safe, especially since I know my baby will most definitely be tasting the paint. Plus, it only takes a few minutes.
To pre-cook the flour, simply spread some flour on a baking sheet lined with parchment paper. Preheat your oven to 350 degrees Fahrenheit and bake the flour for about 5 minutes or until it reaches 165 degrees. In my experience, after just 5 minutes, my flour read over 200 degrees, so you likely only need to put it in for a few minutes. (This is my favorite thermometer ever, by the way!)
Materials for the Activity
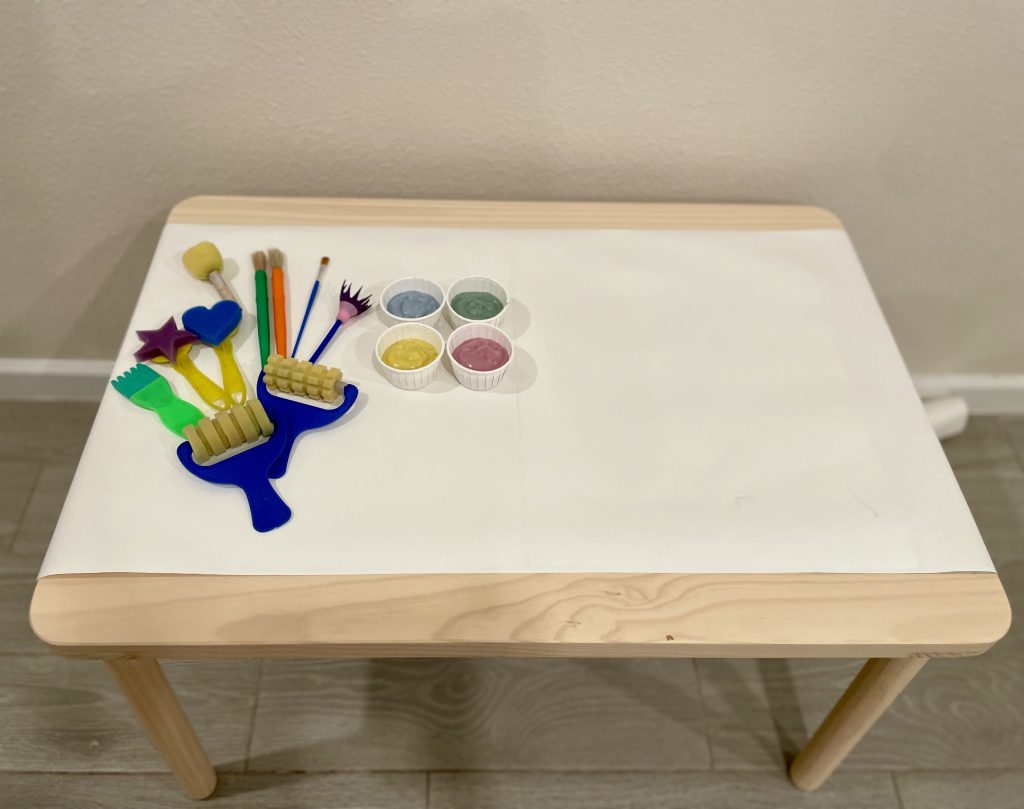
To set up our Taste Safe Finger Paints activity, we use a table from Ikea, but this lookalike from Amazon is almost exactly the same. I cover the table with paper and tape it down to create a blank canvas for the kids. For painting tools, I set out some paint brushes, sponges, and rollers from this paint brush set, which is always a hit when we do art.
I put the paint in little condiment cups I got from the Dollar Store, but you can use any container you have on hand. This setup makes it easy for the kids to dip into the paint and get creative without making too much of a mess. Check out more of our favorite paint materials here!
How to Store Taste Safe Finger Paint
Storing your Taste Safe Finger Paints is easy and convenient. After your painting session, simply transfer the paint into airtight containers to keep it fresh. I recommend storing the containers in the fridge, where the paint should last for about a week.
If you notice the paint starting to dry out over time, you can easily revive it by stirring in a little more water to thin it out. This way, you can keep the fun going all week long with minimal effort!
Clean Up
I was pleasantly surprised by how little mess this activity made, even with my baby smearing the paint all over her face and the table. The food coloring didn’t stain at all, and the mixture was incredibly easy to clean up. Once the paint dries on your skin, it leaves a dry, flaky residue that comes off super easily with water.
When we did this activity, I kept the kids’ shirts on with no smock (I know, living on the edge!), and there were no stains—the paint wiped off really easily. However, to be on the safe side, a smock is always a good idea. We like these smocks, which fit both my baby and toddler perfectly. This way, you can let your little ones enjoy their painting without worrying about any mess!
Visual Recipe for Kids
To make this activity even more engaging and educational, I’ve created a visual recipe that kids can follow along with to help make the Taste Safe Finger Paints. This visual guide includes step-by-step illustrations that are easy for little ones to understand and follow. It’s a great way to involve your kids in the preparation process, making the experience even more fun and interactive.
Sign up with the form above to get your free visual recipe and let your kids join in on the fun of making their own Taste Safe Finger Paints!
Steps to Make Taste Safe Finger Paints

Here’s a simple step-by-step guide to make your own Taste Safe Finger Paints:
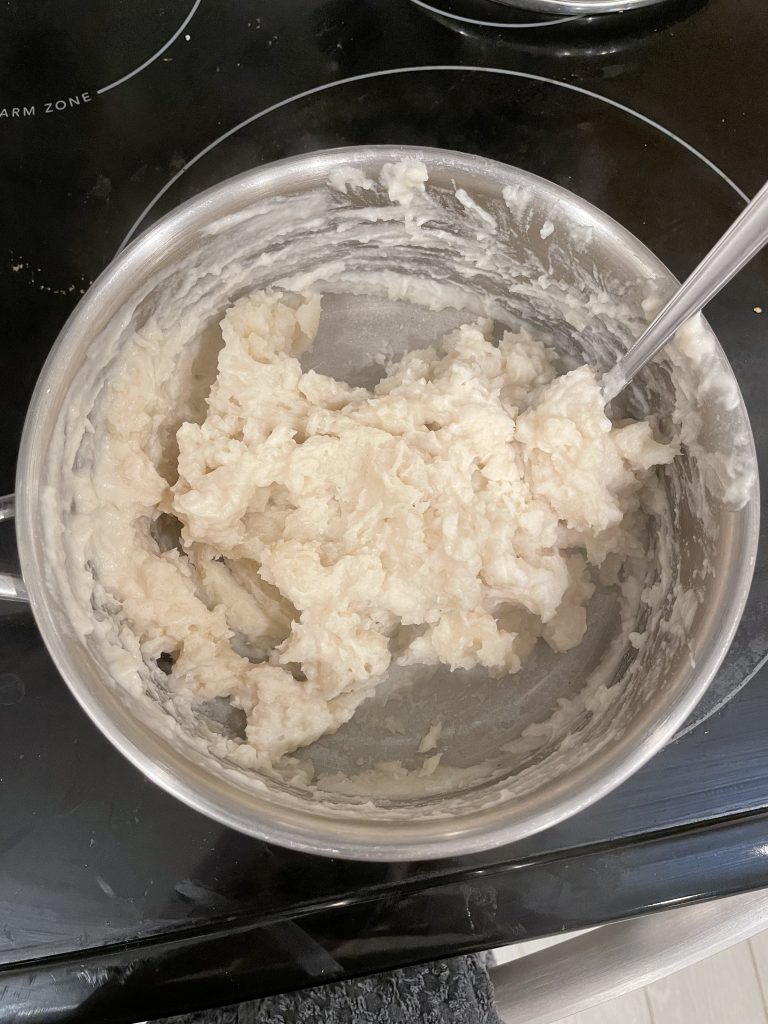
- Combine Ingredients: In a saucepan, combine the flour, water, and salt. Whisk the mixture together on the stove over medium heat. At first, the mixture will become smooth, and then it will start to turn into a paste (see picture below). When this happens, remove the pan from the heat.
2. Adjust Consistency: Slowly add more water to the mixture until you achieve the desired paint consistency. If you want a thicker paint for your kids, add less water.
3. Divide the Paint: Divide the paint into separate containers, depending on how many different colors you want to make.
4. Add Food Coloring: Mix in food coloring to each container to create your desired colors.

5. Cool and Enjoy: Let the paint cool down completely before giving it to your kids to enjoy.

Taste Safe Finger Paints
Ingredients
Method
- Combine flour, water, and salt into a sauce pan over medium-high heat. At first, the mixture will become smooth, and then it will start to turn into a paste. When this happens, remove the pan from the heat.
- Slowly add more water to the mixture until you achieve the desired paint consistency. Add a tablespoon or two at a time. If you want a thicker paint for your kids, add less water.
- Divide the paint into separate containers, depending on how many different colors you want to make.
- Mix in the food coloring to each container to create your desired colors.
- Let the paint cool down completely before giving it to your kids to play.


Leave a Reply