
Making moon sand is a fun activity for young children, especially babies and toddlers who are still exploring the world with their mouths. This taste-friendly recipe only requires three simple ingredients, making it safe and easy to whip up whenever you need a fun, engaging activity. The soft, fluffy texture of moon sand is perfect for little hands to squish, mold, and play with, providing endless sensory exploration.
Moon sand is an excellent filler for sensory bins, offering a unique tactile experience that keeps kids entertained. Its moldable consistency allows children to create shapes and structures, promoting fine motor skills and imaginative play. Whether you’re building castles, digging trenches, or just enjoying the squishy texture, moon sand is sure to be a hit with your little ones.
One of the best things about moon sand is how simple it is to make at home. With just three ingredients, you can create a large batch that will last for multiple play sessions. It’s a great activity for rainy days, playdates, or anytime you need to keep your kids occupied with something safe and enjoyable.
If you like this activity, you’ll love our taste friendly sensory foam recipe!
Disclosure: Some of the links below are affiliate links, meaning, at no additional cost to you, I will earn a commission if you click through and make a purchase.

Materials You’ll Need
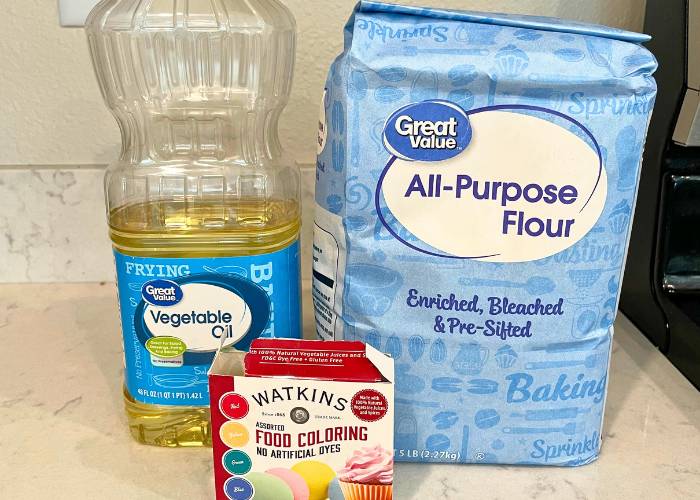
- Oil
- Flour
- Food coloring
You can use any oil you have on hand. For this recipe, I used vegetable oil. We also used all-purpose flour. I haven’t tested with other types of flour, but I assume all-purpose flour works best because it is white and dyes easily if you want to add food coloring. For the food coloring, I used natural food coloring because I prefer my kids not to consume artificial dyes, but you can use whatever food coloring you have available.
If you like this activity, try our chia slime sensory activity!
How to Cook Flour so it is Safe to Eat
Make sure you pre-cook the flour before making this recipe so it is safe to eat. I knew my baby would put this in her mouth so this step was extra important for us. It only takes a few minutes.
To pre-cook the flour, simply spread some flour on a baking sheet lined with parchment paper. Preheat your oven to 350 degrees Fahrenheit and bake the flour for about 5 minutes or until it reaches 165 degrees. In my experience, after just 5 minutes, my flour read over 200 degrees, so you likely only need to put it in for a few minutes. (This is my favorite thermometer ever, by the way!)
How messy is moon sand?

This moon sand activity kept both my toddler and baby busy for about half an hour, which is a long time for them, so I’d say it was a hit! Because my baby tried to eat it and liked to take handfuls of the flour and throw and dump it, there was a bit of a mess afterward. But it was worth it!
My toddler kept most of the sand in our tray, so if it was just him playing, there likely wouldn’t have been that much mess. However, it was pretty easy to sweep up and brush off the kids. The food coloring didn’t stain, it was just the flour that needed to be brushed off everything.
How Long Does Moon Sand Last?
Moon sand can last a long time if stored properly, making it a great reusable activity for your kids. To keep it fresh and moldable, store the moon sand in an airtight container or a zip lock bag. When sealed properly, it should last for a month or two, allowing for multiple play sessions. Just check the texture before each use, and if it feels a bit dry, you can add a small amount of oil to refresh it. With proper storage, your moon sand will be ready for endless hours of fun!
How to Make Moon Sand

To make moon sand, you’ll need these ingredients (this makes enough for 1 color. We used this recipe 4 times for 4 different colors):
- 1 cup of all-purpose flour
- 1/8 cup of oil
- Food coloring
- Follow these simple steps:
- Measure Oil: Measure out 1/8 cup of oil for every color you want to make and put it into separate bowls.
- Add Food Coloring: Add food coloring to the oil and mix well. It’s okay if the food coloring separates from the oil.
- Mix with Flour: Add 1 cup of flour per color to each bowl and mix well. You will need to use your hands to thoroughly mix the ingredients together until you achieve the desired consistency.
If you like this activity, be sure to try our taste safe kinetic sand recipe!
Variations for This Activity
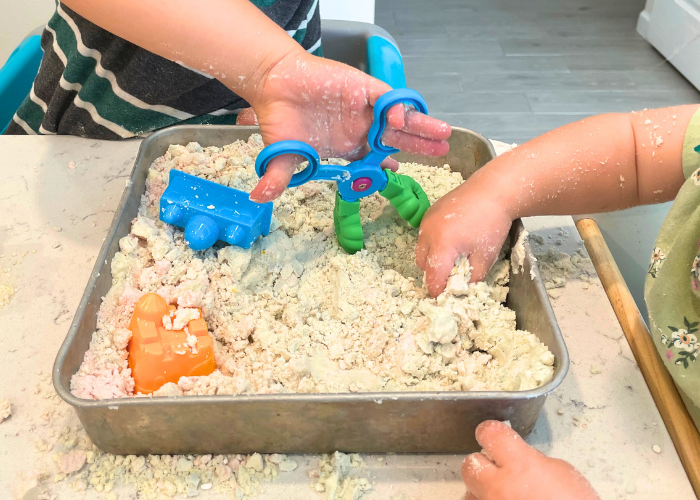
To keep the moon sand activity fresh and exciting, here are some fun variations you can try:
Tools and Molds: Provide cookie cutters, small molds, or plastic utensils for your kids to use with the moon sand. This encourages creativity and helps develop fine motor skills.
Alphabet Hunt: Hide small plastic alphabet letters in the moon sand and have your kids find and identify them. This is a fun way to combine sensory play with literacy learning.
Dinosaur Dig: Bury small dinosaur toys in the moon sand and let your kids dig them out like little paleontologists. This adds an element of discovery and adventure to the play.
Construction Site: Add toy trucks and construction vehicles to the moon sand bin. Kids can use the vehicles to scoop, dump, and build with the moon sand, enhancing imaginative play.
Seasonal Colors and Themes: Change the color of the moon sand to match the current season or upcoming holidays. For example, use orange and black for Halloween, red and pink for Valentine’s Day, or green for St. Patrick’s Day.


Leave a Reply