
Bubble painting is a simple and unique activity that combines the fun of bubbles with the creativity of painting. The concept is simple yet captivating: you blow bubbles infused with paint, and when the bubbles pop on the paper, they leave behind beautiful, colorful patterns. This activity is perfect for an outdoor adventure, as it allows kids to get a bit messy while creating their artwork.
Both of my kids absolutely love bubbles, so adding a paint aspect to their favorite activity was a huge hit. Watching the bubbles float and then burst into bright splashes of color was not only fun but also an exciting way for them to explore their artistic side. It’s a great way to engage children of all ages in a sensory-rich experience that combines play and creativity.
Whether you’re looking for a fun summer activity or a unique art project, bubble painting is sure to bring lots of smiles and giggles. The colorful results are beautiful enough to display, making this a great project for kids to feel proud of their work. So gather your supplies and head outside for some bubble-popping, paint-splattering fun!
If you like this activity, be sure to check out our bubble blowing activity!
Disclosure: Some of the links below are affiliate links, meaning, at no additional cost to you, I will earn a commission if you click through and make a purchase.

Materials You’ll Need for Bubble Painting

- Paint
- Bubbles
- Bubble wand
- Cups
- Paper
For this project, we use this washable paint which worked well and was easy to clean up. We love Gazillion bubbles and won’t buy anything else because these bubbles are just the best—they’re long-lasting and create great bubbles.
I use these paint cups that come with tops to prevent spilling, but you can use any cups you have on hand. These cups are especially handy if you have little ones who tend to knock things over.
For the paper, we used our favorite foldable easel, which was perfect for this activity as it held the paper upright at a good height for the bubbles to pop on. However, you can use any paper you have available. If you don’t have an easel, taping the paper to a wall or fence also works well.
How Messy is Bubble Painting?
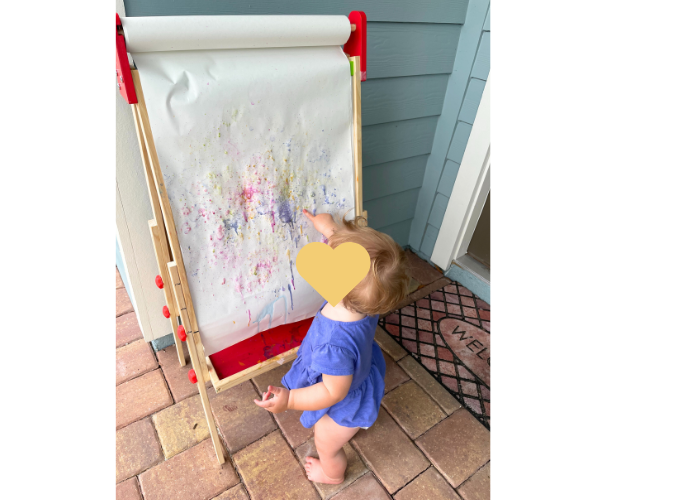
Bubble painting is a bit messy, but that’s part of the fun! When the bubbles pop, they will leave paint, so make sure you do this activity somewhere you don’t mind getting a bit messy. We chose to do it outside, which was perfect because we didn’t have to worry about the mess as much. Some paint got on our driveway, but I just used the hose to wash it off afterward.
When you blow the bubbles onto the paper, sometimes the bubbles will pop, and because your face is so close to the paper, paint might splash on your face. To avoid this, make sure you leave some distance between your face and the paper. Despite the mess, it’s an enjoyable and creative activity that both kids and parents will love!
If you like this activity, save your paint cups and try our bubble blowing painting!
How to Save Bubble Painting Artwork

Saving the artwork after your bubble painting project is easy. Simply let the paint and bubbles dry completely, and the paint colors will be left on the paper. The drying process may take a few hours, depending on how much paint and bubbles were used. Once dry, you can trim the paper to remove any uneven edges or sections where the paint pooled too much.
Displaying the finished artwork is a great way to showcase your kids’ creativity. You can frame the dried paintings, hang them on the refrigerator, or create a fun gallery wall in your home. We have this bulletin board in our playroom where we display the kid’s artwork. Bubble paintings also make wonderful, personalized gifts for family and friends.
How to Do Bubble Painting

Follow these steps to create your own bubble paintings:
- Pour Bubbles into Cups: Pour at least an inch or two of bubbles into each cup. This ensures there’s enough liquid for the bubble wand to reach.
- Add Paint: Pour in a generous amount of paint into each cup. You’ll want to use a lot of paint so that the bubbles have enough color to transfer to the paper. Take your best guess at how much you need here!
- Mix Well: Stir the mixture well to ensure the paint is fully combined with the bubbles.
- Blow Bubbles Toward the Paper: Dip the bubble wand into the mixture and blow bubbles toward the paper. You can experiment with how far away to blow the bubbles, but we found that being pretty close to the paper helped ensure the bubbles popped on the surface and left a colorful mark.
Enjoy the process and have fun watching the bubbles create beautiful, colorful patterns on the paper!
If you like this activity, save your paint cups and try our bubble blowing painting!
Setting Up Your Art Project

We did this project outside to contain the mess, which worked out perfectly. We chose our driveway as the location, and while we did get some paint on the driveway, it was easy to hose off when we were done. Next time, I would probably move to the grass to avoid any potential stains.
We used our foldable easel, which was the perfect height for the bubbles to pop on and made it easy for the kids to see their creations. For the paint, we used our paint cups, which worked well for this project. The cups kept the paint and bubbles contained and made it easy for the kids to dip their bubble wands.
By setting up outside and using the right tools, you can ensure that your bubble painting experience is fun, creative, and relatively mess-free!
If you like this activity, save your paint cups and try our bubble blowing painting!
Variations to This Project
Here are some fun variations to make your bubble painting project even more exciting:
Try Different Papers: Experiment with different types of paper, such as watercolor paper, cardstock, or canvas. Each type of paper will react differently to the paint and bubbles, resulting in various textures and effects.
Glow-in-the-Dark: Add glow-in-the-dark paint to the bubble mixture. Once the painting is dry, it will glow in the dark, adding a magical element to the artwork.
Masking Tape Designs: Place strips of masking tape on the paper in different shapes and patterns before blowing the bubbles. Once the paint is dry, remove the tape to reveal crisp, white lines amidst the colorful bubbles.
Food Coloring: Instead of paint, try using food coloring in the bubble mixture. This is a great option if you want to create a taste-safe version of bubble painting for younger kids who might put their fingers in their mouths.


Leave a Reply