
Bubble painting is such a hit with my kids that I wanted to find another fun way to enjoy it. This time, we tried mixing paint and bubbles in a cup and using a straw to blow bubbles onto the paper. It’s such a simple twist, but it creates colorful patterns that my kids loved! Watching the bubbles grow and pop, leaving behind splashes of color, was mesmerizing for all of us.
This method is a great way to keep the bubble painting fun going (you can check out our other bubble painting activity here). It’s like a two-in-one activity that keeps your little ones entertained and lets their creativity shine. Perfect for a day of messy, colorful fun! Plus, it’s a fun way to engage in sensory play while also working on those fine motor skills.
If your kids are anything like mine, they’ll be thrilled to try this new technique. It’s a wonderful activity to do outside on a sunny day or even inside with a bit of prep to contain the mess. Get ready for lots of giggles and some truly unique artwork!
Disclosure: Some of the links below are affiliate links, meaning, at no additional cost to you, I will earn a commission if you click through and make a purchase.

Materials You’ll Need for Bubble Blowing Painting
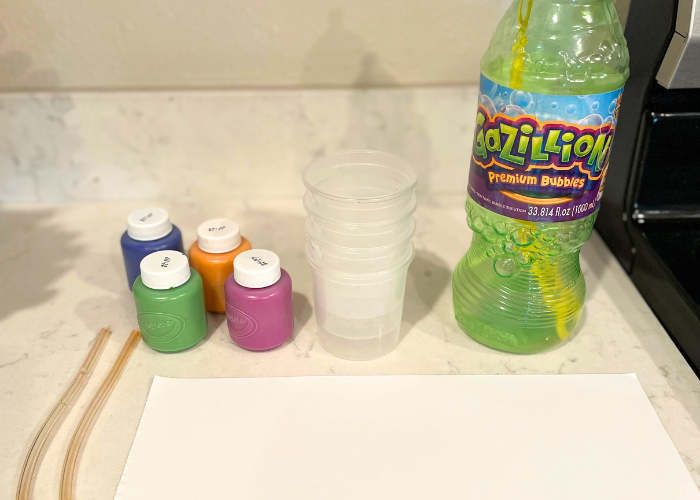
If you’ve already done the bubble painting activity, you can keep your paint cups and use them again. If you’re just starting out with this activity, you will need:
- Bubbles
- Bubble wand
- Paint
- Cups
- Straws
- Paper
We use washable paint for all our art projects, and it works wonderfully for this activity. For the cups, we love these paint cups because they come with lids that help prevent spills, which is super handy with little ones around.
We love using Gazillion bubbles, but for this activity, I experimented with using water and dish soap for two out of the four colors, and I honestly couldn’t tell the difference. So, if you don’t have bubbles on hand, soap and water work just as well. This makes it an easy and flexible activity that you can set up with whatever you have at home.
Teaching Kids to Blow Through the Straw (and Not Drink It)
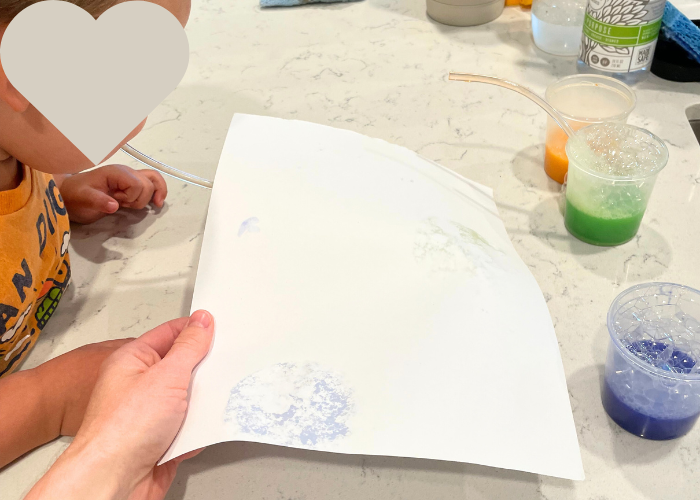
Before starting the bubble blowing painting activity, it’s important to teach kids to blow through the straw rather than drink from it. Here’s how I approached it with my son:
First, I explained to him what we were going to do and made it clear that we would be blowing through the straw, not drinking from it, because paint is yucky! To make sure he understood, we practiced blowing through the straw a few times without any paint or bubbles. This helped him get the hang of it and reinforced the idea of blowing instead of sipping.
Despite our practice, my son inevitably took a sip out of habit. Needless to say, he didn’t do it again after tasting the paint! If you’re concerned that your child might drink the mixture, you might consider using food coloring instead of paint for a safer alternative.
Practicing beforehand and explaining the activity clearly can help prevent accidents, but it’s always good to have a backup plan like using food coloring to ensure a safe and fun experience for everyone.
How to Do Bubble Blowing Painting

There are two fun ways to create beautiful bubble blowing paintings. First, let’s start by setting up your paint cups (if you did the bubble painting activity already, you can use your same cups!):
Step-by-Step Instructions
- Prepare the Paint Cups: Pour bubbles into the paint cups, or mix water and dish soap if you don’t have bubbles. Use about an inch or two of liquid, leaving plenty of space for bubbles to form. I used a couple of inches of water and two pumps of dish soap.
- Add Paint: Pour in a decent amount of paint so that the bubbles will be saturated with color and can transfer it to your paper.
- Mix Together: Stir the mixture well to combine the paint with the bubbles or soapy water.
Two Methods for Bubble Blowing Painting

- Method One: Paper on Top of the Cup
- Step 1: Place your paper on top of the cup with the straw sticking out.
- Step 2: Blow bubbles through the straw until they reach the top of the cup and start to touch the underside of the paper.
- Step 3: Once the paper starts to become wet with bubbles, you can remove it and try another color. Move the paper around to create different patterns.
- Method Two: Cup on Top of the Paper
- Step 1: Place the paint cups on top of the paper.
- Step 2: Blow bubbles through the straw so that they overflow the cups and fall onto the paper.
- Step 3: As the bubbles pop on the paper, they will leave colorful paint marks, creating a bubbly mess that kids will love (and it’s a lot of fun for adults too!).
Both methods create unique and vibrant artwork. Choose one or try both to see which you and your kids enjoy the most!
When you’re done with the activity, be sure to save your paint cups and try our other bubble painting activity!
Saving the Artwork

Saving your bubble blowing paintings is simple and they dry beautifully. Here’s how you can preserve the masterpieces created using either method.
After you’re done with the activity, wait until all the bubbles have popped. You can even have some fun popping the bubbles yourself! Once the bubbles have popped, pour off any excess liquid from the paper.
Next, lay the paper flat on a towel to dry. Leave it for a few hours until it’s completely dry. The colors from the bubbles will leave vibrant and unique patterns on the paper. Once dried, your bubble painting artwork will look great and can be proudly displayed!
These dried pieces make for wonderful keepsakes or even gifts, showcasing the fun and creativity of this unique art activity.
Variations to the Experiment
Here are some exciting variations to try with your bubble blowing painting project:
- Food Coloring Instead of Paint: Use food coloring instead of paint for a different effect. This is especially great if you want a taste-safe version for younger kids who might put their fingers in their mouths. Food coloring can create bright, vibrant colors.
- Layering with Other Mediums: Combine bubble painting with other art mediums like crayons, markers, or watercolors. Have your kids draw or color first and then add bubble paint layers for a mixed-media effect.
- Interactive Art: After blowing bubbles and creating the initial artwork, let the kids use brushes or their fingers to blend and spread the paint, enhancing their creativity and adding a personal touch.
- Bubble Wrap Printing: Instead of blowing bubbles, dip bubble wrap into the paint mixture and press it onto the paper. This creates a similar bubbly effect with a different method.


Leave a Reply